
The latest version of NME adds a new feature to the tool, “Three Letter Compiler” (TLC). This feature is designed to get you going quickly on a new or existing project.
First, make sure you have the latest NME installed. If are going to do some cpp compiling from windows, it is best to install the latest version of Microsoft Visual Studio (“Desktop” version). Now while you are waiting for that to download, you can have some fun with NME.
The haxe ‘haxelib’ utility allows you to run library scripts using the ‘run’ command, like:
haxelib run nme
NME has various features ‘commands’ that you can use, the first one is ‘help’, which prints a list of possible commands:
haxelib run nme help
The first thing you will notice that it is going to get pretty tedious typing “haxelib run nme …” every time you want to do something, so the best thing to do is to setup an alias. If you have your own admin style, you may choose to do this anyway you like (like the unix ‘alias’ command), but you can also achieve this using:
haxelib run nme setup
which will create a small shell script or batch file to save you some time. So now we can use the “nme” command instead of haxelib.
Now we have done some basic setup, it’s time to check out the demos. To see the list of installed demos, use the command:
nme demo
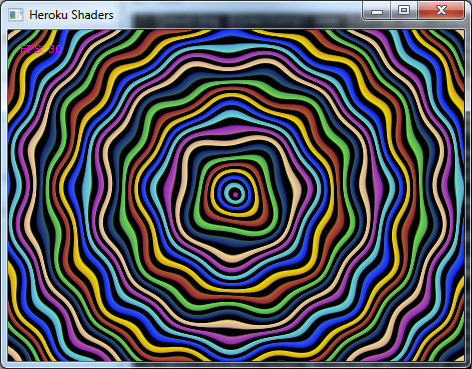
This should give you a list of 20-something demos to try. Listed on the left is the abbreviation you can use – just pass this command to the nme demo command (eg, ‘he’ is short for ‘HerokuShaders’). When you run a demo, the binary files will be created inside your current directory, so before we start, it is best to move to a ‘scratch’ area that we can delete later.
cd c:\temp

mkdir scratch

cd scratch
Has your compiler finished downloading yet? Maybe not, we will try it first with neko.
nme demo hero neko
This should get you up and running. You can explore the other demos like this. You will notice the last parameter, ‘neko’. This is the target – if you were not to specify anything here, nme would assume the default target, which is a ‘cpp’ compile. You can set the default target using the nme ‘set’ command:
nme set target neko
Now code will be compiled by default for neko. You can remove the set value with the ‘unset’ command. For advanced users, you can use the command:
nme set bin c:/temp/scratch
To set the output (binary) directory for all your nme projects. This will allow you to keep the generated output files outside your source file tree, separating the disposable files from the precious. You can also do this when compiling any project by using the ‘-bin path/to/output’ command line options. Don’t forget to “nme unset bin” to restore normal behaviour.
If you are every wondering what is going on under the hood, and where the files are actually going, you can use the ‘-v’ verbose flag to get nme to dump out a bunch of stuff as it goes. You can also set this on for always, using:
nme set verbose
Ok, the demos are working, but you want to get your own code going, and it is time to fire up the text editor. The main nme drawing APIs are based in the flash drawing APis. The easiest way to get started is to create a “DisplayObject” and draw something into it. If this is you “main” class, then NME will take care of getting your object onto the screen. The best place to start is in a empty directory with a “Sprite” class. So we can start with some code like this (in “MyGame.hx” – the name must match the class name):
class MyGame extends nme.display.Sprite
{
   public function new()
   {
      super();
      graphics.beginFill(0x00ff00);
      graphics.drawCircle(100,100,100);
   }
}
Now, in the directory you can issue the command:
nme
With a little TLC, you can get your first game going (not very exciting mind you). When run on its own, the nme command will use the default target (which we have set to neko), it will run the default command (which is ‘test’, unless you use the ‘set’ command to say otherwise) and it will look for the best project file. If there is no project file, then it will look for a single “.hx” file. If the command gets confused by multiple files, it will simply just not work. You can also use this command in the demo directories since they have either a single project or single haxe file. Indeed, you can compile most projects like this.
There are also a few things you can do with source code using special comments to change some of the programs attributes. At some point it is worth switching over to a proper project file, but until then you can have some fun with ‘// nme:’:
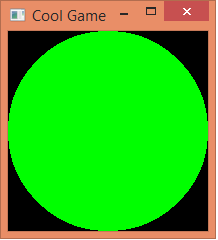
// nme: background=0x000000
// nme: width=200
// nme: height=200
// nme: title=Cool Game

class MyGame extends nme.display.Sprite
{
   public function new()
   {
      super();
      graphics.beginFill(0x00ff00);
      graphics.drawCircle(100,100,100);
   }
}
Cool game indeed.
Nme also allows you to compile demos from some other projects. Just add the project name after the ‘demo’ command. Openfl is closely related to NME, so they are quite compatible. Firstly, install the openfl demos, using
haxelib install openfl-samples
Now you can get a list with:
nme demo openfl
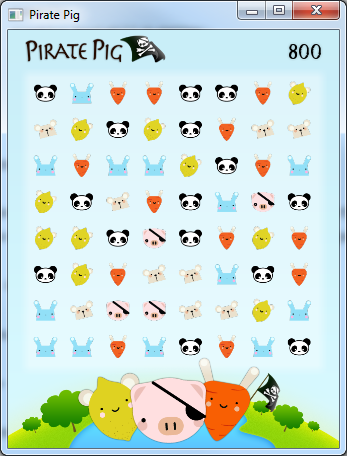
And then run one with:
nme demo openfl pirate
Since HaxeFlixel uses openfl, it too shares compatibility with NME. However, you currently must be running the a version newer than 3.2.2 to get it to work. First install the flixel samples with:
haxelib install flixel-demos
Then get the development version by by cloning the repo from GitHub and using haxelib to point at this new download. This in turn needs the git version of flixel-addons, so updating requires:
haxelib git flixel https://github.com/HaxeFlixel/flixel.git

haxelib git flixel-addons https://github.com/HaxeFlixel/flixel-addons.git

nme demo flixel
Will show the list. We can now try the classic bunnymark, but this time will will make sure we compile it for ‘cpp’ for maximum speed. (Has your download has finished yet?). Arrr!
nme demo flixel flxbunny cpp

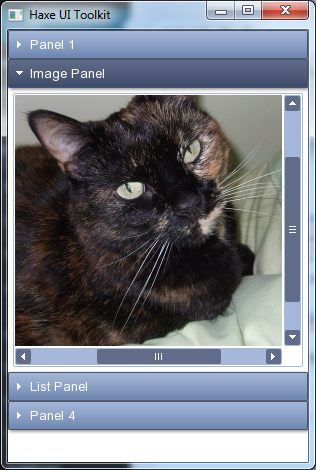
Another project you can try is the “haxeui” project. With:
haxelib install haxeui

nme demo haxeui

nme demo haxeui accord
Hopefully the NME TLC can help your workflow a bit.